All products are independently selected by our editors. If you buy something, we may earn an affiliate commission.
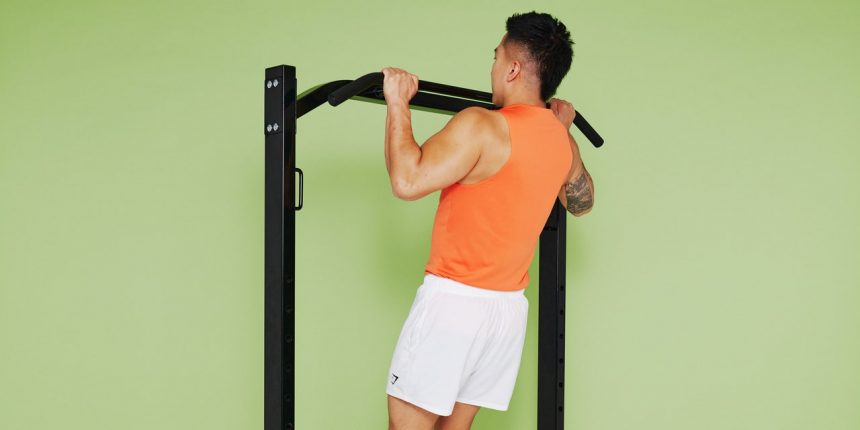
In its simplest terms, the pull-up seems pretty basic: hang from a bar, then pull yourself up to it. It’s not complicated, but that sure doesn’t mean that it’s easy. In fact, this bodyweight, no-fancy-footwork-needed move is one of most difficult strength exercises to master, making it a common reach-for-it goal for many gymgoers out there.
Impressive yet intimidating, the pull-up is widely considered the holy grail of strength exercises, Kira Stokes, CPT, a personal trainer in New York and LA and the creator of the KSFIT app, tells SELF. “It’s a flex when you can do a pull-up, and especially if you can bang them out rep after rep.”
That’s because a pull-up is not something that just anyone can hop up onto a bar and do with ease—even someone who is otherwise relatively strong. The move takes genuine, focused work, along with a whole lot of strength. “To the naked eye, it’s an upper-body exercise, but it’s truly a full-body exercise,” Stokes explains.
“When your goal is to do a pull-up, you really have to dissect what a pull-up is from the ground up, then determine how you can properly strengthen the areas that are most involved to progress to it,” adds Stokes. So let’s get to dissecting everything you need for pull-up progression, shall we?
Pull-ups require a ton of back and arm strength—and help you build even more.
Pull-ups primarily work your lats (our largest back muscles), biceps, and forearms, Amy Potter, CPT, personal trainer in Hermosa Beach and strength coach at Ladies Who Lift, tells SELF. They also require significant core engagement and control, and a whole lot of shoulder mobility, says Stokes.
Stokes says to think of them as hanging hollow holds. Your arms are overhead (that’s where shoulder mobility comes in), your core has to be super strong to keep you torso stable, and your legs and glutes must fire so that they don’t flail as your body moves up and down.
During a pull-up, you’re using the strength in your lats, biceps, and forearms to literally lift the entirety of your bodyweight, Potter notes. That’s why if you haven’t been working on upper-body strength regularly, they’ll be a lot more challenging for you, she says.
Beyond giving you bragging rights in the gym, adding pull-ups to your workouts is great for building strength, which can benefit you in and out of the gym. “Having a strong posterior chain—the back side of the body—helps you maintain good posture, reduces the risk of injuries, and can translate into improved form and strength in other exercises, such as a deadlift, where having a strong back is also important,” Potter explains.
It’s also a great grip strength exercise, Stokes adds. That’s important, since research links it as a solid predictor of overall health and longevity. Chances are, if you’ve got a great grip, that means you’ve been strength training and are experiencing the health benefits that come with that—say, for your heart, lungs, bones, and more, all of which can help you in the long run.
Getting your first pull-up takes time, patience, and dedication.
We’re not going to sugarcoat it here: Pull-ups are hard AF. Depending on your starting point, it could take months (or even years) of focused work in the gym to do your first one.
“It’s good to have strength goals, but it’s really important to have realistic goals and to know that a pull-up isn’t one of those things that’s going to happen overnight,” Stokes says. “For most people, it’s probably not going to happen in six or even eight weeks. The timeline is very personal because it depends on your starting point in terms of strength,” she explains. It’ll also depend on non-training related factors, like sleep, recovery, stress, and nutrition, Potter adds.
That’s why one of the most important skills when chasing this—or any—fitness goal is patience, says Potter. “There is no hack, quick fix, or magic pill that will help you do your first one. It will take time, consistency, effort, and patience.” Your journey will include building strength and mobility in the muscles that are key during the exercise itself and working through pull-up progressions to get comfortable with the general movement so you can eventually graduate to the full thing.
Here’s your roadmap for reaching your pull-up goals.
“The best way to improve at any exercise is to train it consistently,” Potter says. “If your goal is to get better at pull-ups, you should be doing some variation of them weekly, along with other back, bicep, and forearm exercises and applying the principles of progressive overload.” Quick refresher: Progressive overload means gradually increasing the stress you put on your muscles as you get stronger and adapt so that you keep challenging them—say, by adding more weight or increasing reps.
Your pull-up workout plan should consist of the following major categories of work:
- Shoulder mobility and core prep
- Back- and arm-strengthening exercises
- Pull-up progressions, starting with dead hangs
Potter recommends doing 20 sets of upper-body strength work each week, which roughly shakes out to three to four sets of six exercises. These 20 sets can be split up however it works for you: Maybe that’s two upper-body days, three full-body days, or one big pull day with a couple other upper-body sets thrown in during your other exercise days throughout the week.
The specific reps you do in each set will depend on the exercise, what your goals are, and what equipment you have available, but in general, she suggests a range of 3 to 4 sets of 3 to 15 reps. As you get stronger and start to use heavier weights, the number of reps you can eke out will decrease—that’s totally normal and expected. Then, as you get even stronger, they’ll creep back up. (After which, it’s time to up the weight again! And so the cycle of progressive overload continues.)
In addition to that straight strength work, Stokes says it’s important to mix in shoulder mobility drills, hollow holds (on the floor), and then, after a few weeks, some dead hangs. She recommends doing these at the beginning of your workout. Once you gain some strength, it may help to do your bigger moves in the beginning of the workout before you get tired, she adds. After all, you want to lift heavy enough that your muscles are pretty spent by the last rep, to make sure you’re building muscle and strength effectively.
Finally, you’ll start practicing actual pull-ups by first doing some dead hangs, then band-assisted chin-ups, negative chin-ups, then finally pull-ups. “It’s very hard to say when you’ll be ready for one, but it doesn’t hurt to try. You never know until you try,” says Stokes. “You could try it every session, as long as it’s not going to frustrate you.” Attempting a pull-up frequently can also give you a good gauge about where you are and how far you’ve come. Whether you try at the beginning or end of your workouts is up to you. You may not want to save it until the end when you’re tired, says Stokes, but it’s also important to be warmed up before just jumping onto the bar and trying to crank one out.
Shoulder Mobility and Core Prep
Do these exercises in the beginning of your strength workout to warm up your body, improve shoulder mobility, and work on the total-body engagement you need to nail a pull-up.
Behind the Back Shoulder Drill
Katie Thompson
- Lie face down.
- Place both hands palms down on the back of your head. Your elbows should be pointed out to the sides. This is the starting position.
- Extend your arms in the shape of the letter Y.
- Reach your arms as wide as you can and circle them down to the sides of your body with palms down. As soon as you can no longer keep your palms down, flip your hands over to palms up and bring your hands to the center of your lower back.
- Circle your arms back in the reverse direction to return to the starting position. This is 1 rep.
- Do 5 to 10 reps.
Moving your arms in this pattern helps improve rotation and mobility in the shoulder joints and the scapula (shoulder blades). Focus on keeping this movement very slow and intentional to make sure you’re getting the benefits.
I-Y-T Raise
Katie Thompson
- Stand with your feet shoulder-width apart. With your core engaged, hinge forward slightly, keeping a slight bend in your knees.
- Bring your arms up straight, keeping them in line with your shoulders. This is the I part of the exercise. Bring your arms down.
- Bring your arms up straight and out at a 45-degree angle. This is the Y part of the exercise. Bring your arms down.
- Bring your arms directly out to the sides, bringing your shoulder blades together. This is the T part of the exercise. Bring your arms down. This is 1 rep.
This exercise is great for improving mobility in the rotator cuff, the small muscles inside the shoulder joint that are key for stabilization. Bonus: You’ll also get into your rear deltoids (in the back of your shoulders) and trapezius (upper back and neck muscles)—both of which are going to be important on your pull-up journey.
Hollow Hold
Katie Thompson
- Lie faceup with your arms straight over your head, keeping them close to your ears.
- Contract your abs to press your low back into the floor.
- Point your toes, squeeze your thighs together, squeeze your glutes, and lift your legs off the floor.
- Lift your shoulders off the floor and keep your head in a neutral position so that you’re not straining your neck. Your legs and mid back should both be off the floor, and you should be in the shape of a banana with just your low back and hips on the floor.
- Stay in this position for as long as you can, up to 10 seconds.
- Do 3 to 5 reps.
The goal with a hollow hold is to build core strength and stability. It works your entire core, including the rectus abdominis (the muscles that run vertically along your abdomen; what you picture when you think of “abs”), your transverse abdominis (the deepest core muscles), plus your lower back and obliques.
Strength Exercises
Do these exercises two to three times (a minimum of 20 sets) per week to build strength in your back and arms. Stokes recommends doing the harder exercises (compound moves, like rows) in the beginning of the workout, and saving the easier ones (isolation exercises, like bicep curls) for the end when you’re starting to get tired.
Single-Arm Bent-Over Row
Katie Thompson
- Stand with your feet hip-width apart, holding a weight in your left hand with your arm at your side. Step forward about two feet with your right foot, and rest your right hand on your right quad. This is the starting position.
- With your core engaged, hinge forward at the hips, pushing your glutes back, and bend your right knee, making sure you don’t round your shoulders. (Your hip mobility and hamstring flexibility will dictate how far you can bend over.)
- Gaze at the ground a few inches in front of your feet to keep your neck in a comfortable position.
- Pull the weight up toward your chest, keeping your elbows hugged close to your body, and squeezing your shoulder blade at the top of the movement. Your elbow should go past your back as you bring the weight toward your chest.
- Slowly lower the weight by extending your arms toward the floor. This is 1 rep.
A row targets the latissimus dorsi (lats, the broadest of your back muscles), rear deltoids, rhomboids, and biceps, as well as your trapezius. Doing it with one arm at a time also adds in a core stability challenge. If you’d prefer, you can also do the exercise with a cable or resistance band, Stokes says.
Inverted Row
Katie Thompson
- Position yourself underneath a bar. You can use parallel bars (as shown), holding them in a neutral grip, or a barbell positioned on a squat rack with an overhand grip, arms just wider than shoulder-width apart.
- Put your feet together and lengthen your legs in front of you. Rest your heels on the floor.
- Pull yourself up toward the bar, squeezing your shoulder blades and engaging your core, quads, and glutes.
- Pause for a moment before lowering yourself back down. This is 1 rep.
This move primarily works your lats, rhomboids, and traps, plus your core, biceps, and deltoids. It’ll also start getting you used to the motion of pulling your bodyweight up. And if you do the move with a barbell, it will also help you train the same grip that you’ll use for a pull-up. During an inverted row, Stokes says to think about keeping your body in a strong plank position to avoid arching your back. To make the move easier, move your legs closer to your body. To make it harder, bring your legs farther out. “The more parallel to the floor you are, the harder the inverted row is,” she notes.
Reverse Fly
- Stand with your feet hip-width apart, holding a weight in each hand with your arms at your sides, palms facing in, and elbows slightly bent.
- With your core engaged, hinge forward at the hips, push your butt back, and bend your knees slightly, so that your back is no lower than parallel to the floor. (Depending on your hip mobility and hamstring flexibility, you may not be able to bend so far over.) Gaze at the ground a few inches in front of your feet to keep your neck in a comfortable position.
- Keeping your back flat, core tight, and elbows bent, raise your arms out to the sides until they are in line with your shoulders. Pause for a second, and then lower your arms back down to the starting position. This is 1 rep.
This move will hit your rear deltoids, or the backs of the shoulder joint. These muscles are important for stabilizing the shoulder during pulling motions—like a pull-up.
Lat Pull-Down
Katie Thompson
- Loop a resistance band over a sturdy anchor above you.
- Stand with one foot about a foot in front of the other so your stance is staggered. Stand far enough forward that there’s tension in the band. This is the starting position.
- Grab onto one end of the band with each hand and extend your arms toward the ceiling at a slight diagonal. Your torso should be upright and leaning slightly forward. Keep your core tight, back flat, and chest lifted.
- Slowly pull your hands down and out to shoulder height. Hold for a moment, squeezing your back and shoulder blades tight.
- Slowly extend your arms back out to the starting position. This is 1 rep.
If you have access to a lat pull-down machine, you can do this exercise using that instead, says Stokes. Otherwise, a resistance band makes a great tool for working the back and shoulder muscles that you need to get super strong to be able to pull your body up to the bar.
Pull-Over
Katie Thompson
- Lie on your side on a mat with a dumbbell (or kettlebell) in front of you. Grab the weight with both hands, hold it to your chest, and turn flat on your back, shoulder blades pressed into the ground. Keep your feet hip-width apart. (You can also do this move on a weight bench—just make sure it’s a flat bench rather than one that’s inclined or declined.)
- Grip the dumbbell vertically with both hands around one end, as pictured. (If the weight is smaller, you can also grip both ends of the dumbbell with your palms facing each other.) Lift it into the air directly above your chest, keeping your arms straight. Engage your core and press your lower back into the floor.
- Slowly bring the dumbbell over your head, keeping your lower back connected to the ground. Bring the dumbbell as far as you can overhead without letting your lower back come off the ground. Depending on your abilities, you may be able to gently touch the weight to the floor as pictured. (But it’s totally okay if you can’t make it that far!)
- Reverse the movement, bringing the weight back to the starting position. Continue to engage your core as you move the weight. This is 1 rep.
The overhead pull works overhead shoulder mobility while also engaging your lats and core, Stokes says—making it a great move for pull-up prep.
Hammer Curl
Katie Thompson
- Hold a dumbbell in each hand, arms relaxed by your sides, and palms facing each other.
- Curl the weights to your shoulders.
- Bend your elbow to lower the weight back down. This is 1 rep.
Biceps play an important role during pull-ups, so it’s a great idea to target them with curls. The hammer curl, in particular, engages your forearms more than a standard biceps curl and also engages the brachialis in your upper arm (thanks to the grip position). To get the most out of the exercise, focus on gluing your elbows in place and only moving your forearm up and down.
Pull-Up Progression Exercises
After a few weeks of building up your strength, it’s time to start working on the pull-up movement—starting with the most modified version and eventually progressing up to the real deal. These moves are listed in the order in which you’ll do them. A few weeks into your pull-up plan, move your hollow hold to the bar—a.k.a., try your first dead hang!
Stick with hangs for a few weeks, and then try the next progression on the list to see if you’re ready. Then do that move for a couple weeks until you’re ready for the next, and the next, and so on. Instead of aiming for a specific number of reps, the goal here is to play around a bit and gauge where you’re at—so instead, focus on doing what you can and try scaling up to the next progression when you feel strong and ready to try. FYI, you should still be keeping up with your strength work, just adding these progressions on as an additional exercise so that you can start building the skill.
Active Dead Hang
Katie Thompson
- Grip a bar with hands just wider than shoulder-width apart, palms out.
- Draw your shoulder blades together and down the back, engage your core, and keep the neck long.
- Let your body weight sink towards the floor, feeling the stretch down your mid to lower back.
- Hold for as long as you can, from 10 to 60 seconds. Do up to 5 reps.
“Think of hanging as progressing your overhead shoulder mobility work,” says Stokes. It’s important to draw your shoulder blades down and together so that you can make sure your lats are engaged before you progress to a pulling movement. Once you feel comfortable completing your reps, you can try increasing the amount of time you hang during your next workout. After a few weeks of progressing, you can move to the next step.
Band-Assisted Chin-Up
Katie Thompson
- Tie a long medium-to-heavy resistance band around a pull-up bar. Bend your knees and place one of them into the loop of the band. (You’ll likely need to stand on a bench or sturdy step to get set up.)
- Grip the bar with an underhand grip, palms facing you, and your hands just wider than shoulder-width apart.
- Draw your shoulder blades together and down the back, engage your core, and keep the neck long.
- Keeping your knees bent, let your body weight sink towards the floor. Then, pull yourself up to the bar until your chin reaches the top. This is 1 rep.
There are two things about this move that make it easier than a full pull-up. First, you’ll be using chin-up grip (palms facing toward your body) instead of the overhand pull-up grip (palms facing out); this tends to be easier because your biceps assist more than they do in a pull-up, Potter explains. Second, the band helps make the motion easier by giving some assistance. This allows you to experience the sensation of doing a full pull-up, Stokes says, which can help you understand the motion (and build your confidence). “Make sure to take a moment to hang in that starting position and properly engage and then pull so that you’re not using the band as a springboard,” she notes.
Negative Chin-Up
Katie Thompson
- Stand under a pull-up bar. Jump up and grip the bar with your hands just wider than shoulder-width apart, palms facing in.
- Keep your shoulder blades together and down the back, engage your core, and keep your neck long as you slowly straighten your arms and lower your body down toward the floor.
- When you’re almost at the floor (or your step), put your feet on the floor (or the ground) and let go of the bar. This is 1 rep.
The negative movement allows you to strengthen the lowering, or eccentric, portion of a pull-up, says Potter. “Eccentrics are a great way to build strength, and get your grip used to bearing your full weight.”
Chin-Up
Katie Thomspon
- Grip a bar with hands just wider than shoulder-width apart, palms facing in towards you. Draw your shoulder blades together and down the back, engage your core and pull yourself up, driving your elbows toward ribs.
- Lift your chin over the bar; pause. Slowly lower for 1 rep.
Like we mentioned, chin-ups are typically a bit easier than pull-ups, because the grip allows your biceps to assist more, Potter notes. “I highly recommend starting with trying to get your first chin-up, because you will likely be able to do that quicker than getting your first pull-up,” she says.
Pull-Up
Katie Thompson
- Grip a bar with hands just wider than shoulder-width apart, palms facing in towards you. Draw your shoulder blades together and down the back, engage your core and pull yourself up, driving your elbows toward ribs.
- Lift your chin over the bar; pause. Slowly lower for 1 rep.
- Grip a bar with hands just wider than shoulder-width apart, palms out. Draw your shoulder blades together and down the back, engage your core and pull yourself up, driving your elbows toward ribs.
- Lift your chin over the bar; pause. Slowly lower for 1 rep.
“Pulling all of your body weight is a big feat!” Stokes says. If at any point you get discouraged, remind yourself that this process takes a lot of time. “It’s not that you can’t do them, you can’t do them yet,” she clarifies. “That mindset is what’s going to give you the confidence to try and work up to that pull-up.” And it’s going to feel pretty damn good once you finally do.
Demoing the moves above are Caitlyn Seitz (GIF 1), a New York–based group fitness instructor and singer-songwriter; Amanda Ting, DPT, CSCS, (GIF 2), a personal trainer at Mark Fisher Fitness in NYC; Amanda Wheeler (GIF 3), host of the Covering Ground podcast; Jamie Song (GIF 4), NASM-certified personal trainer based in New York City; Landyn Pan (GIFs 5, and 10-14), an online fitness and nutrition coach who helps LGBTQ+ individuals feel confident and affirmed in their bodies; Tray Drew, MPH (GIFs 6 and 8), owner/operator of Body By Tray and an ISSA-certified personal trainer and corrective exercise specialist; Rosimer Suarez (GIF 7), a special education teacher from New York City; and Billy Anslow-O’Rourke (GIF 9), doctor of physical therapy and Queens-based group fitness instructor.
Related:
- 15 Dumbbell Back Exercises to Help You Build Strength and Improve Posture
- A Lower Back Workout to Strengthen Your Entire Core
- 15 Kettlebell Exercises That Will Work Every Muscle in Your Body
Get more of SELF’s great fitness coverage delivered right to your inbox—for free.
